Purchased by Me | Affiliate Links
This morning I posted some photos of Girly Bits Holochrome powder, which I did without the use of gel polish. I’ve actually had a few of the powders in my possession for awhile but I’m not very good with gel and honestly don’t like using it. I did a little trial and error and finally found a method that worked for me.
So here is my no gel Girly Bits Holochrome Powder tutorial!
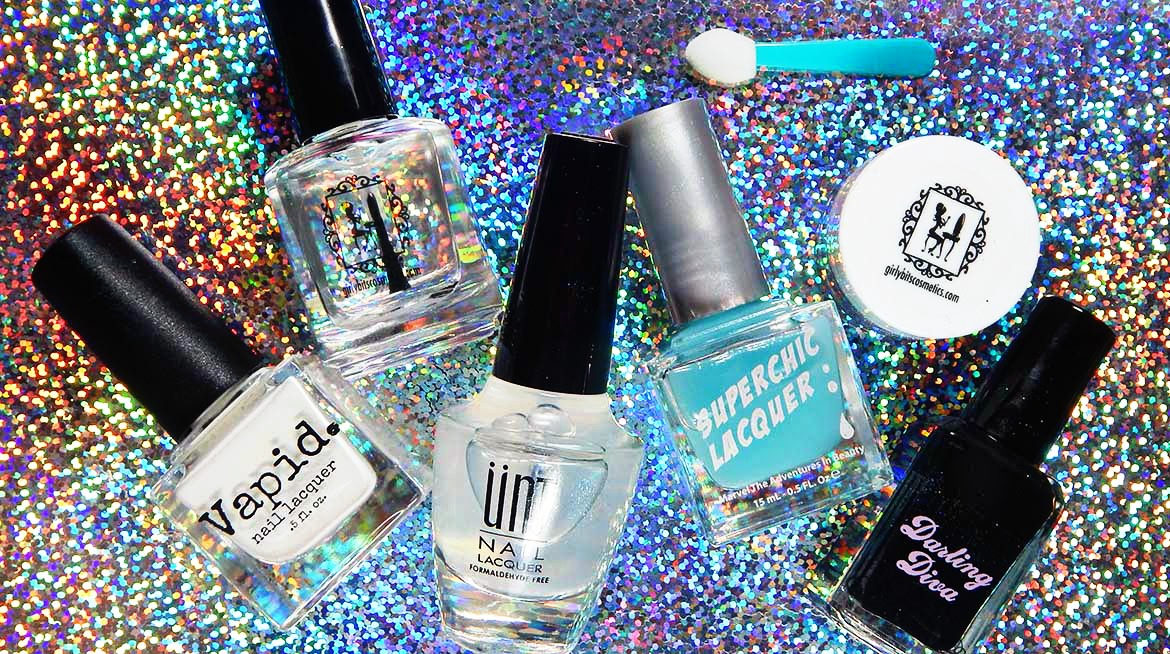
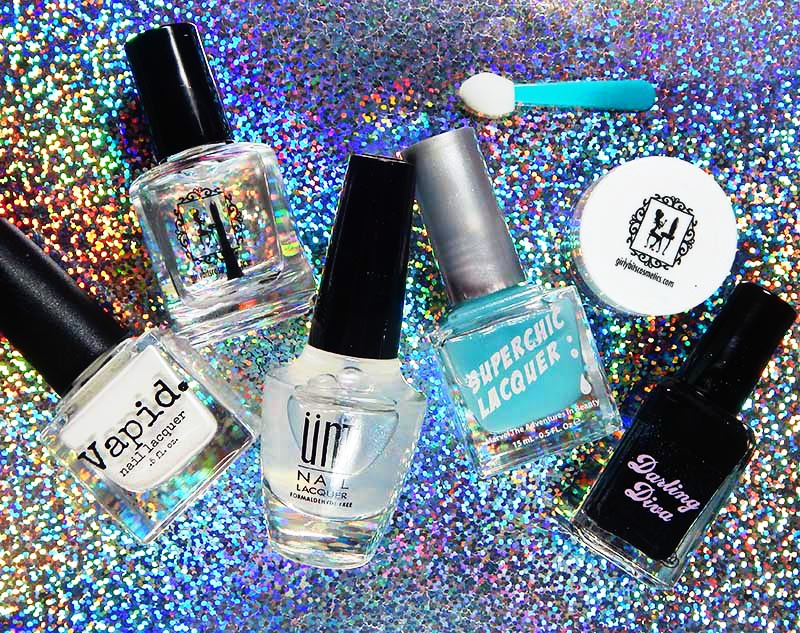
First we’ll take a look at everything I used for the no gel method.
I’ll go through step by step on how I did this. When I redid it tonight, it took me about 30 minutes total (most of it being dry time between coats) which I didn’t find to be too bad. My application can still use some work, but overall it’s not horrible.
Because gel isn’t needed for this, normal remover can be used to remove this as well. On the downside though, it will last much like a normal manicure. Gel will last longer. You have to weigh the pros and cons on which method to use.
Let’s take a look!
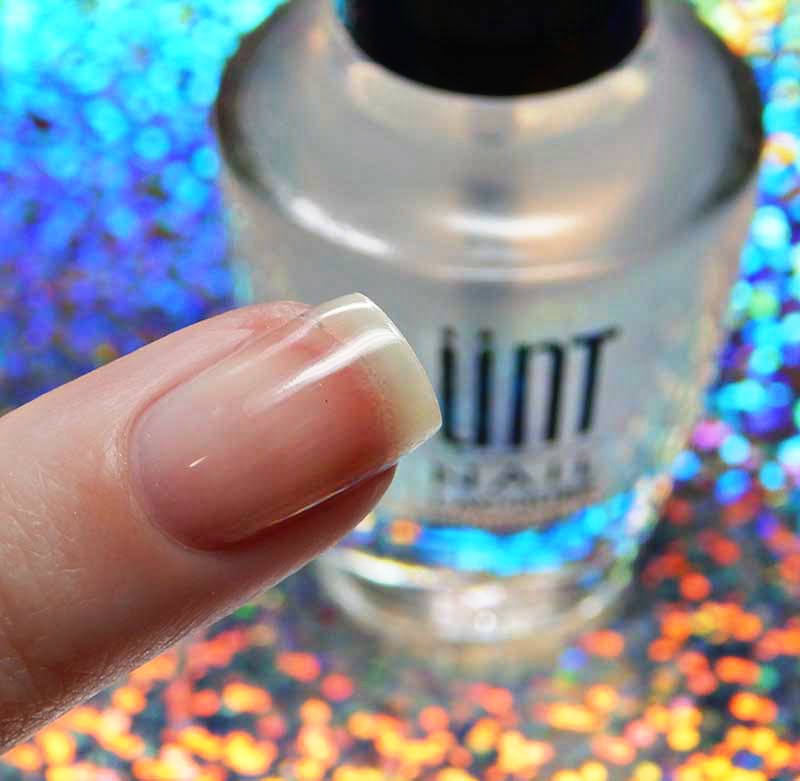
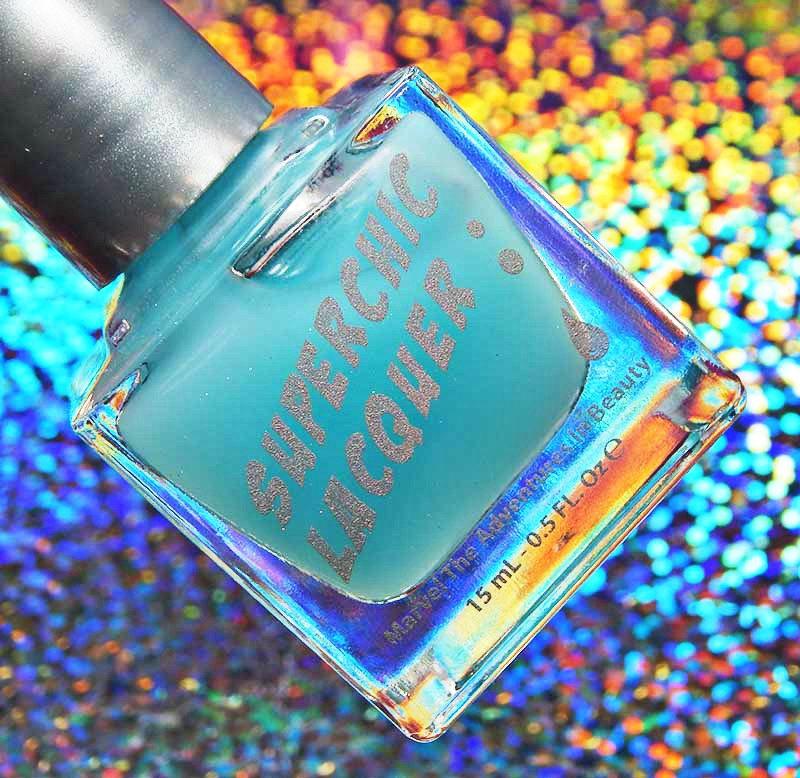
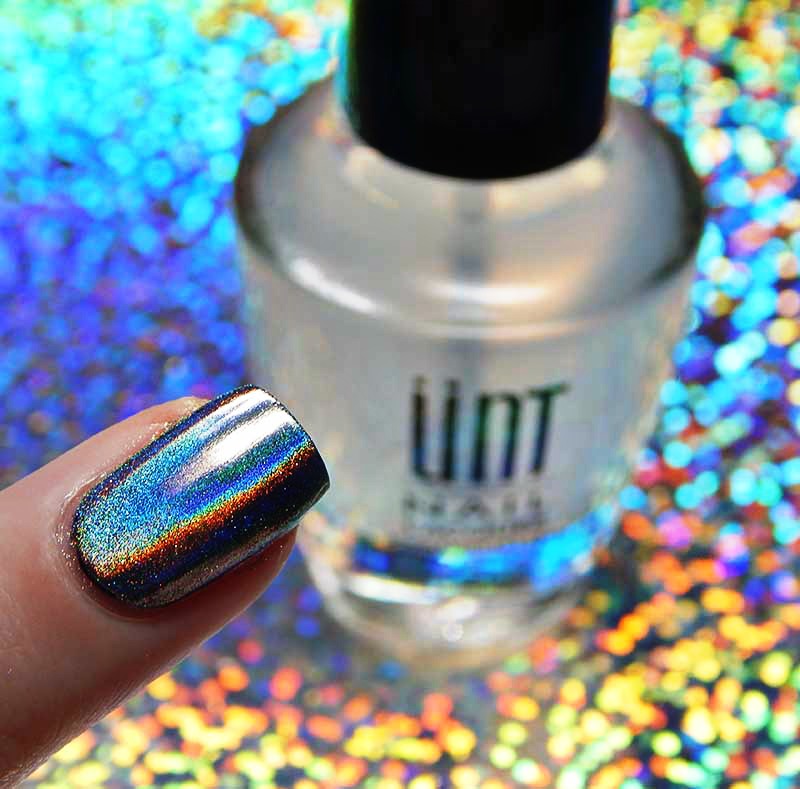
Step 1: UNT Nail Lacquer Base
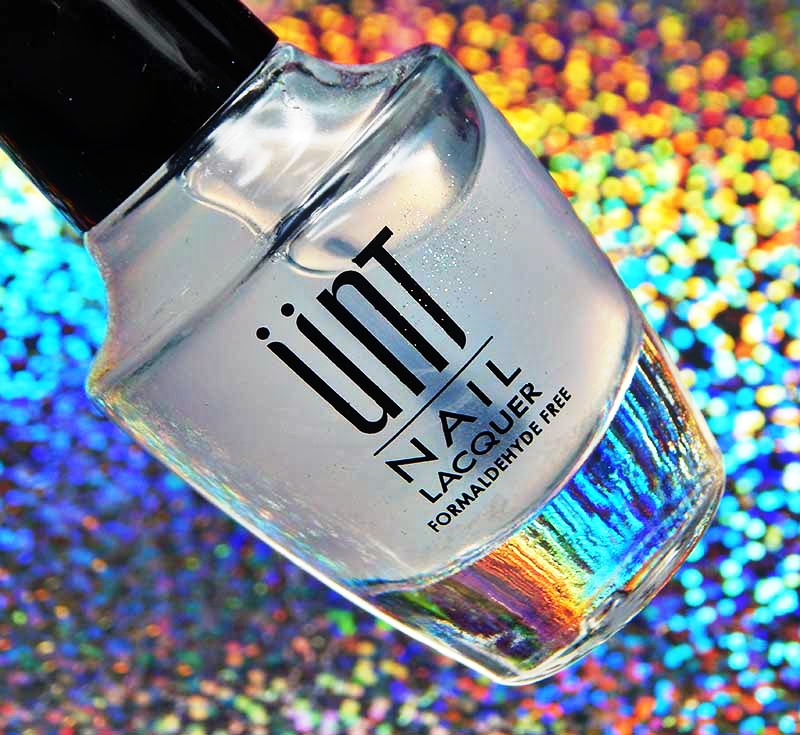
To start I used UNT Nail Lacquer Base. You can use any base for this, I personally used UNT because I’m going to use it again and cut down on products needed for this post.
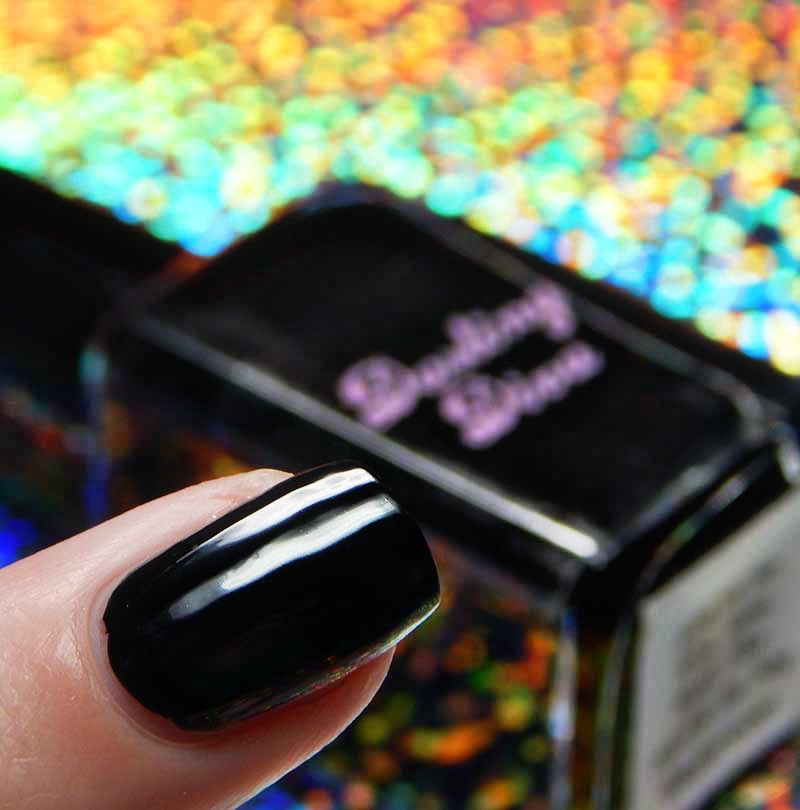
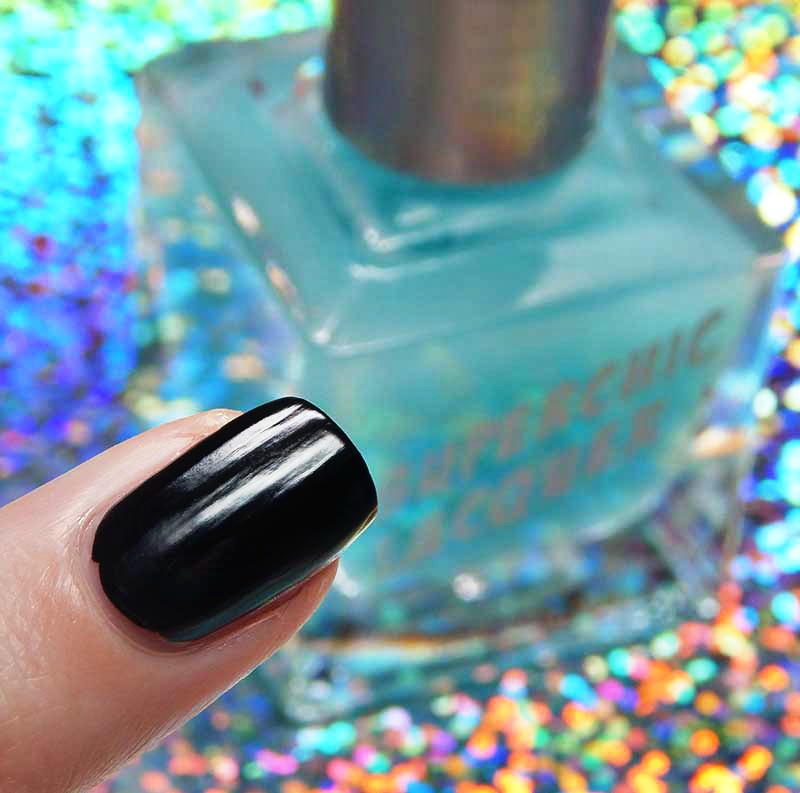
Step 2: Darling Diva Polish You’re So Hot You Melt The Plastic In My Underwear
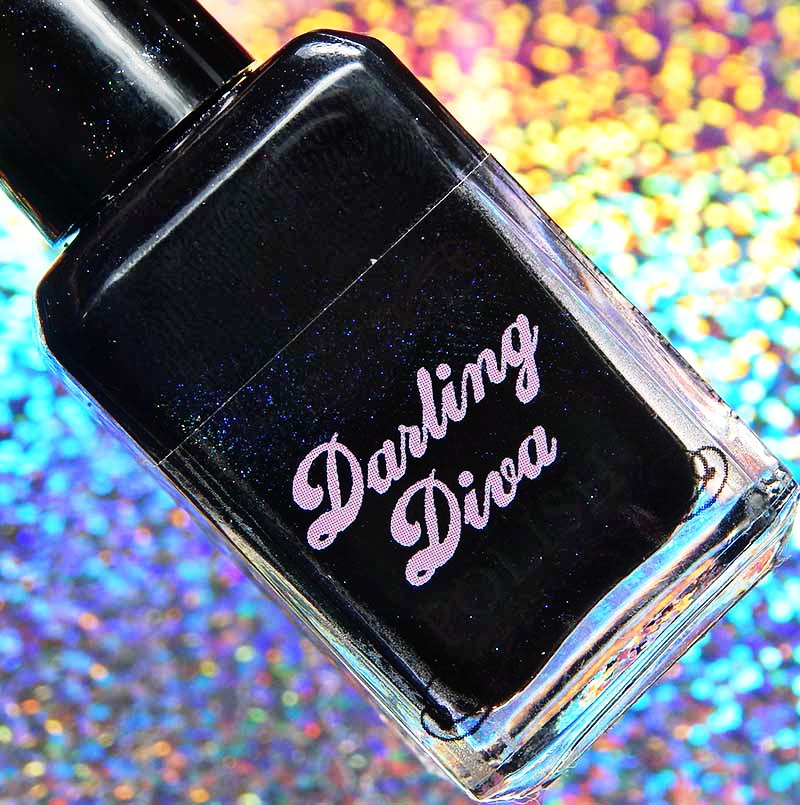
Step 2 is a black creme base (unless you want a color other than black, any color would work)
I personally use Darling Diva Polish You’re So Hot, You Melt The Plastic In My Underwear because it’s a simple 1 coat black polish. I received a bottle of this to assist in a Darling Diva Polish review, but I kept using it and purchased a second bottle.
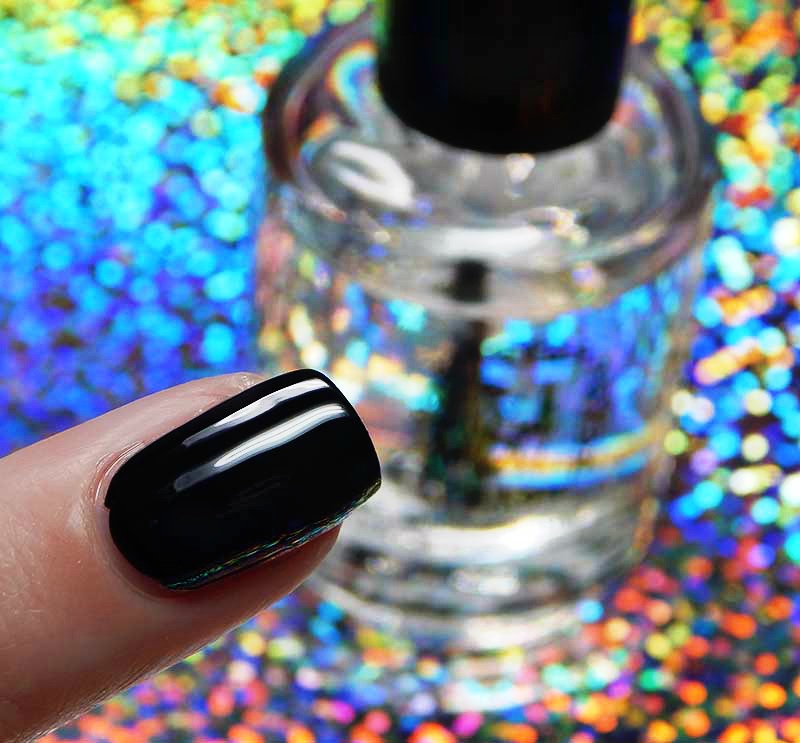
Step 3: Girly Bits Glitter Glaze Top Coat

To speed up dry time, I do a coat of fast dry top coat. I personally love Girly Bits Glitter Glaze and use it in most things .
If you want to cut down on steps, this one can be skipped. Just make sure your first layers are dry before moving on.
Step 4: Superchic Lacquer G-Force X
Here is the secret to the no gel for me! I bought Superchic Lacquer G-Force X Base Coat which is a base that helps burnish and bond powders like Girly Bits Holochrome powder (but also can work with chrome or multichrome powders!)
I did 1 coat of this over the Girly Bits Glitter Glaze Top Coat
Step 5: Vapid Lacquer Commitment Issues Peel Off Base
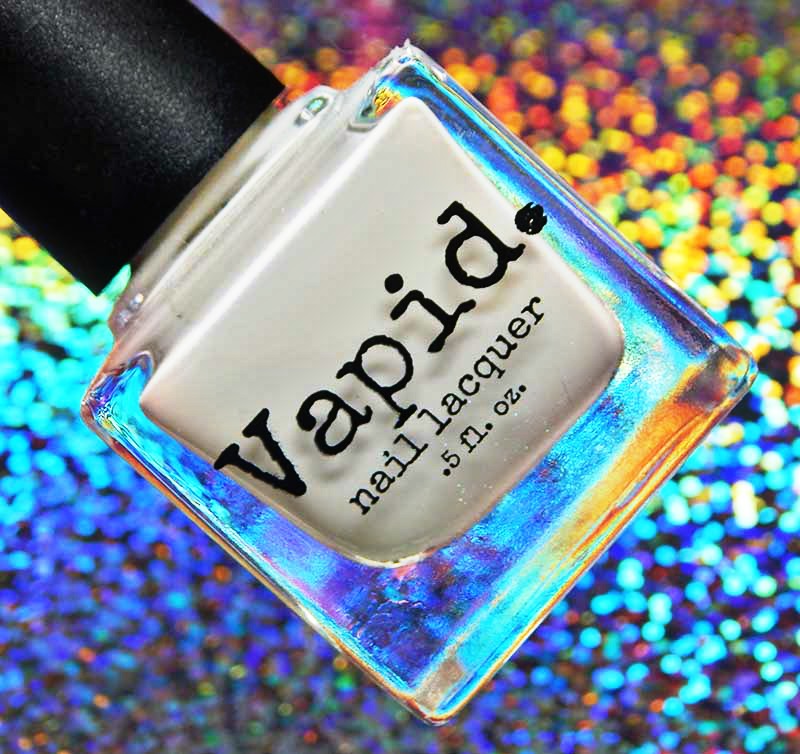
I usually use Vapid Lacquer Commitment Issues Peel Off Base Coat to swatch with and on the nail directly. Basically I couldn’t find my latex barrier for skin, but this isn’t that different so I went ahead and used this to help with clean up.
Generally I would use this BEFORE I applied the Superchic Lacquer G-Force X, but I found it helped me time the drying better for the G-Force X. In my trials I kept either applying the powder to the G-Force X too quickly or too slowly. When I applied the latex protector, by the time it was dry, the powder was ready to apply to the G-Force X. I’m impatient, and this just gave me a good visual indication to do it all.

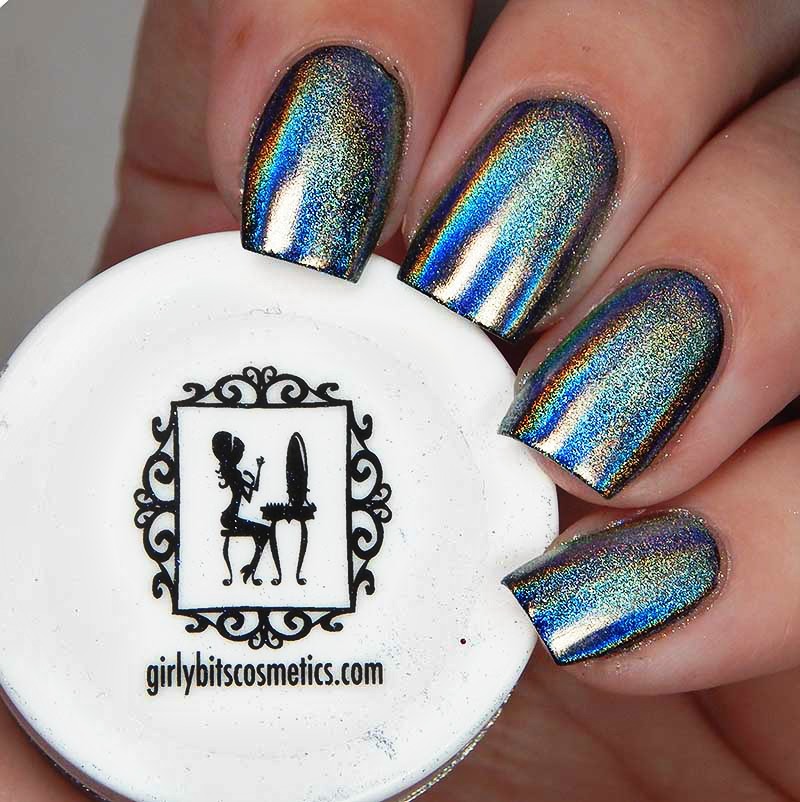
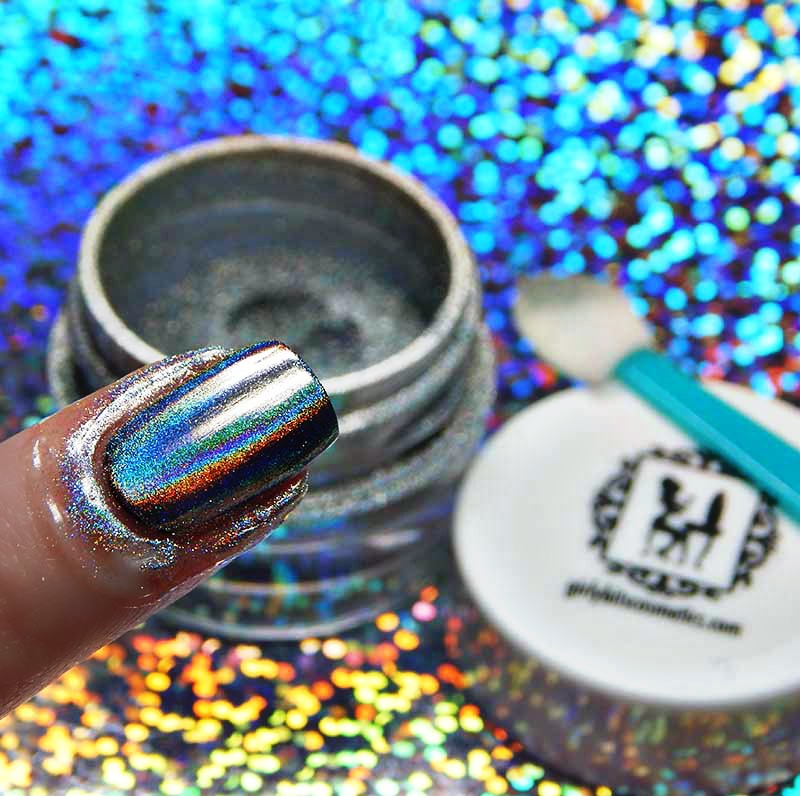
Step 6: Girly Bits Holochrome Powder
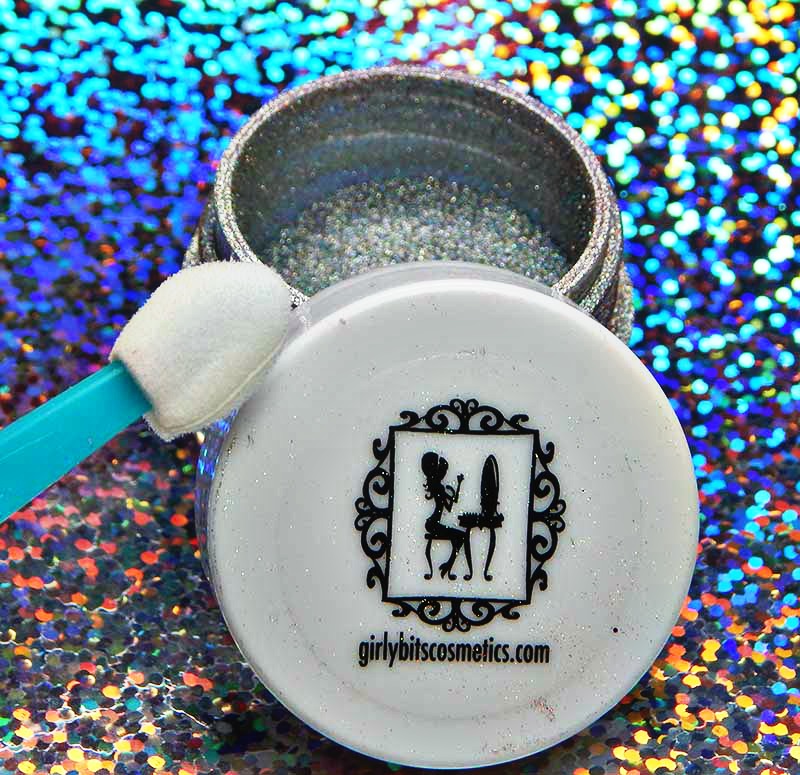
The next step was to apply the Girly Bits Holochrome Powder! The fun part! When the Vapid latex is dry, I used an eyeshadow applicator (I bought a pack of 10 at Walgreens for about 99 cents) to apply the holochrome powder. I dipped the applicator in lightly and then rubbed it into my nails one at a time. I lightly rubbed it in until I got that super holo, smooth look.
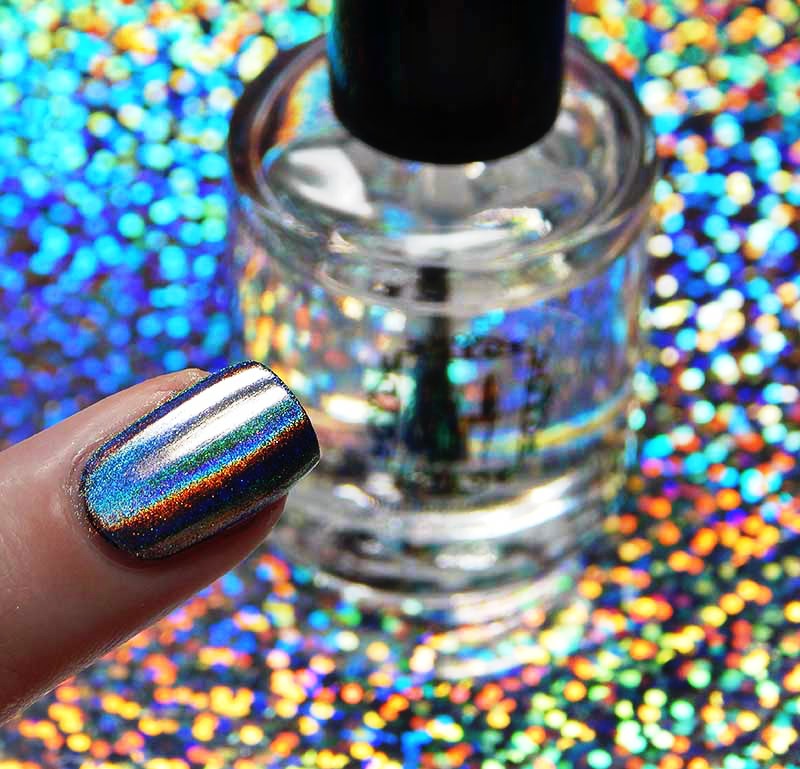
Step 7: UNT Nail Lacquer Base
This was the step that took a LOT of trial and error. Normal top coat would streak the powder used and ruin it, so I needed a barrier between the powder and the top coat. I used 1 thin coat of UNT Nail Lacquer base and it didn’t streak the powder or ruin the mani in any way. I’ve done it a few times now and it’s worked each time, so I’m happy with that. It didn’t seem to dull the holo either. Another plus!
This works as a topper to protect the holo powder because it’s water based (from what I’ve been told) so any water based top or base coats should work, but I’ve only actually tried this one and cannot say for sure what the success rate is for other water based products
UNT takes a little bit to dry completely, so give it a solid 3-5 minutes before the next step to be sure it’s completely dry.
Step 8: Girly Bits Glitter Glaze Top Coat
Last step is the top coat over UNT! This seals everything in and gives it a nice finish.
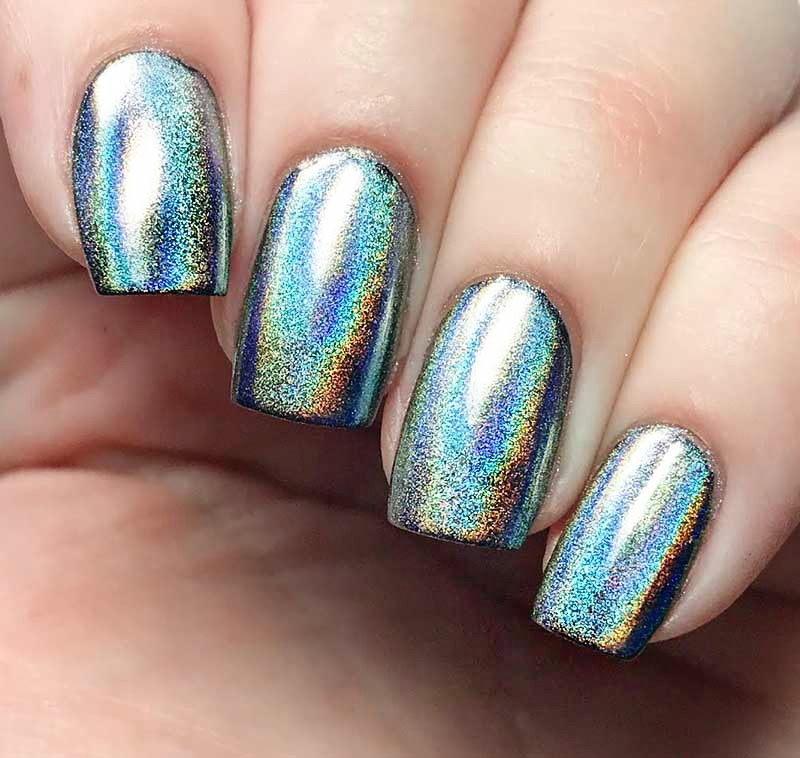
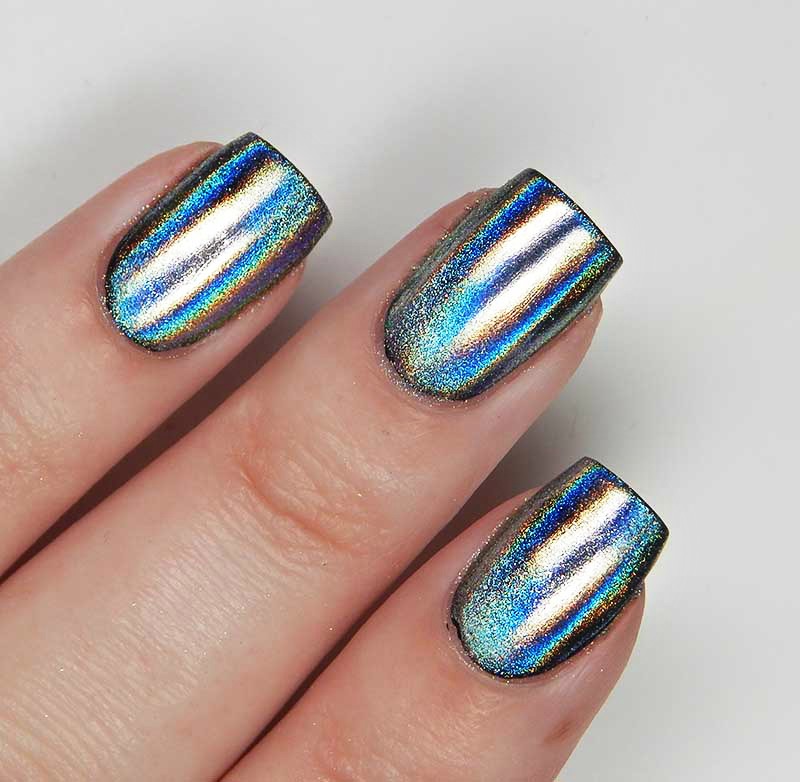
Done
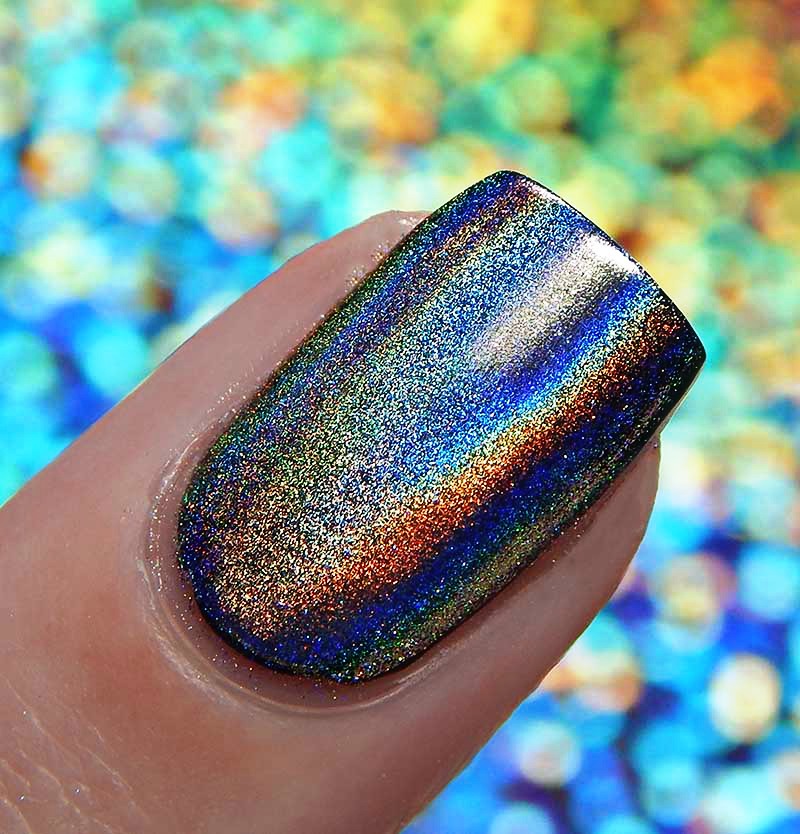
Now we’re done! Here are photos I took throughout the day, both in artificial light and sunlight.
First we’ll see the artificial lighting, then the fun sun shots!
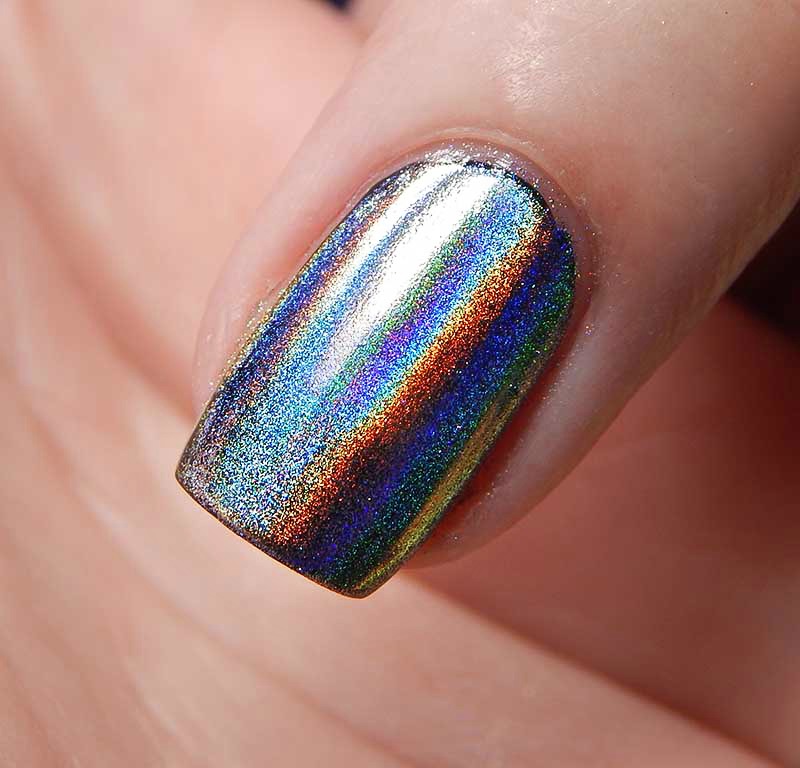
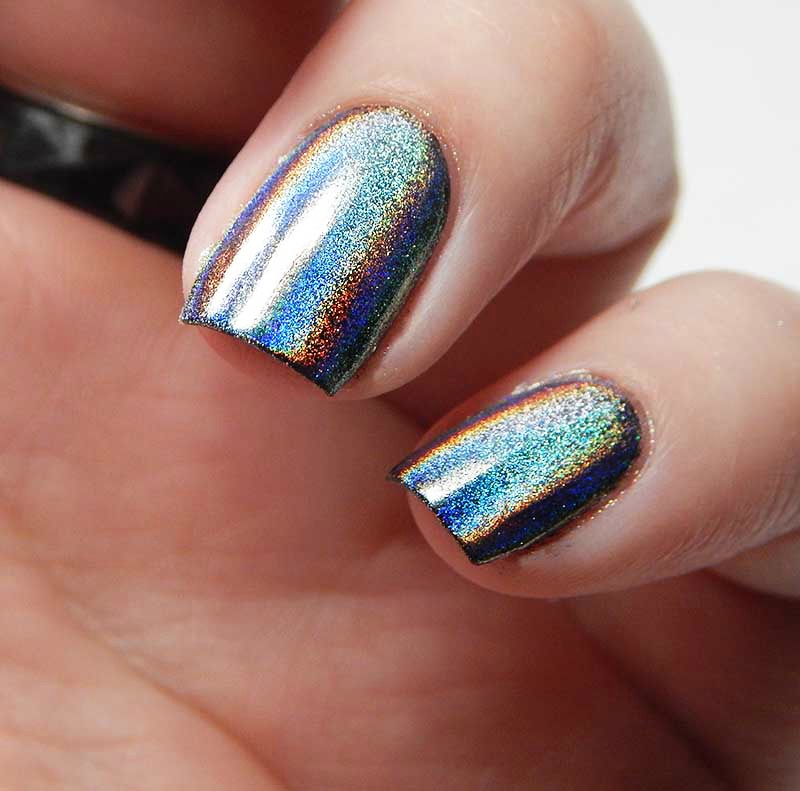
Now in sunlight!
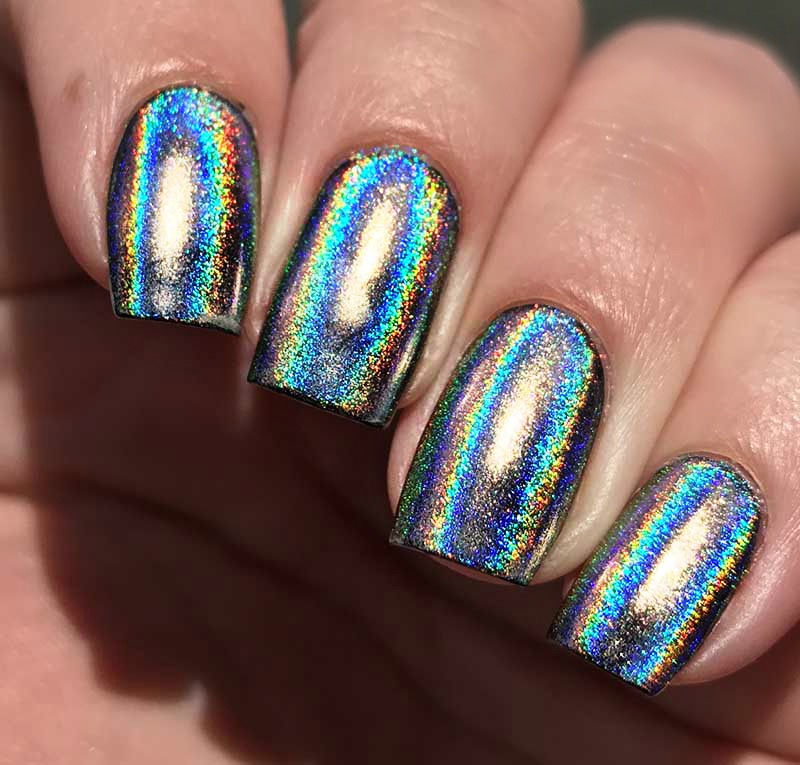
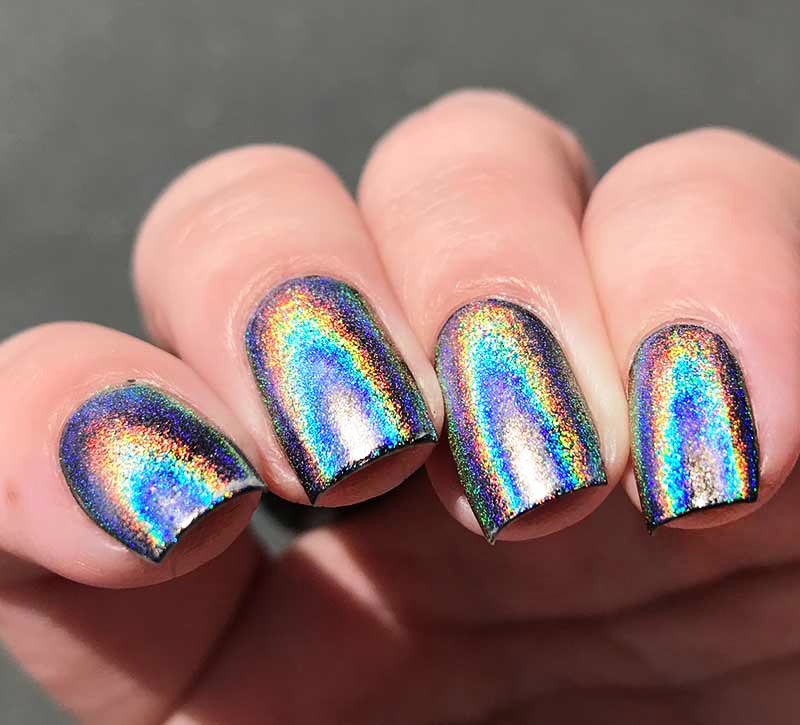
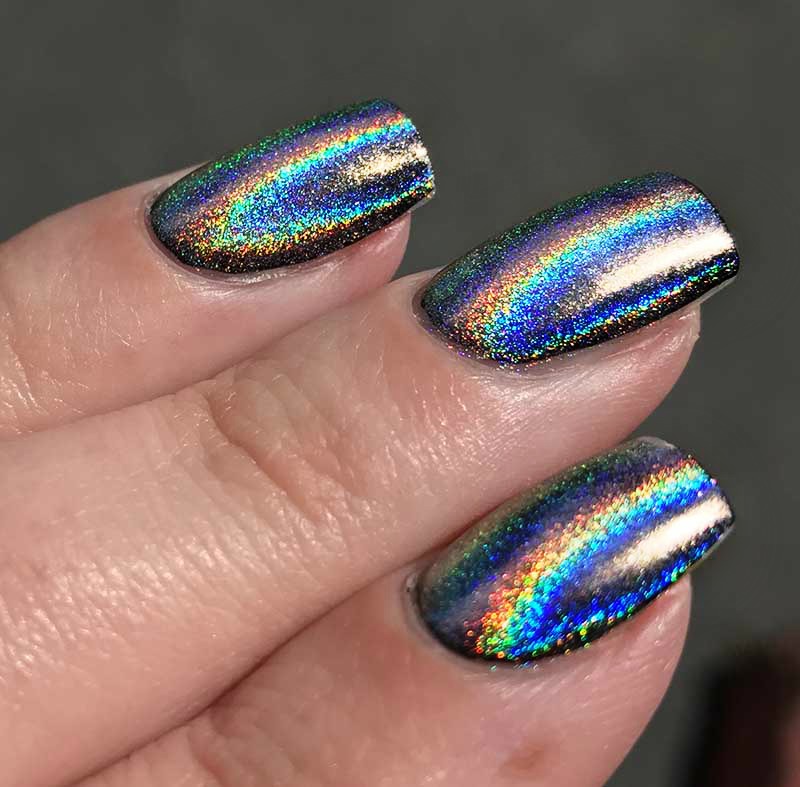
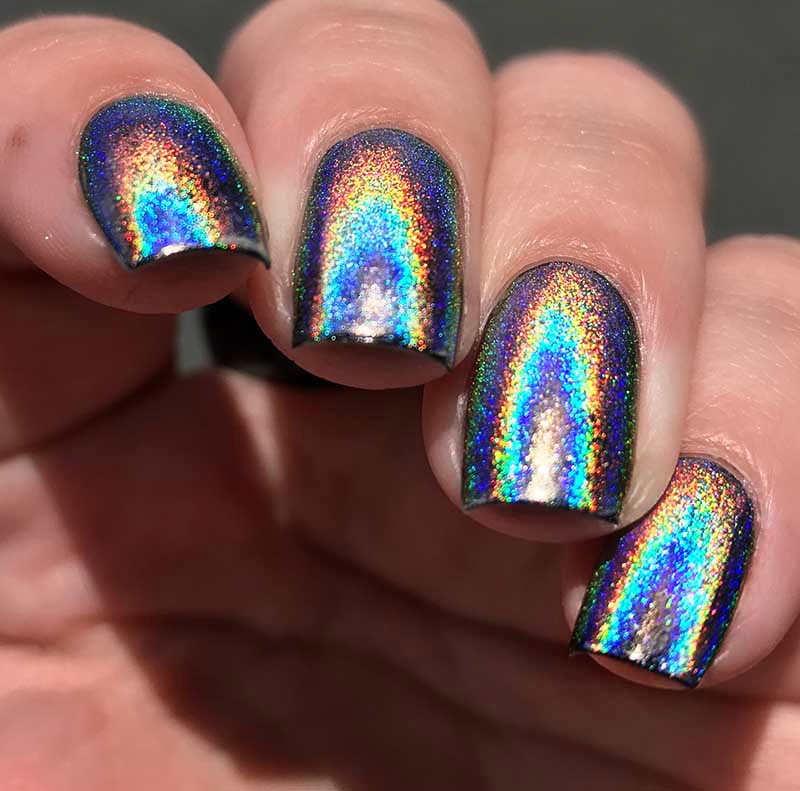
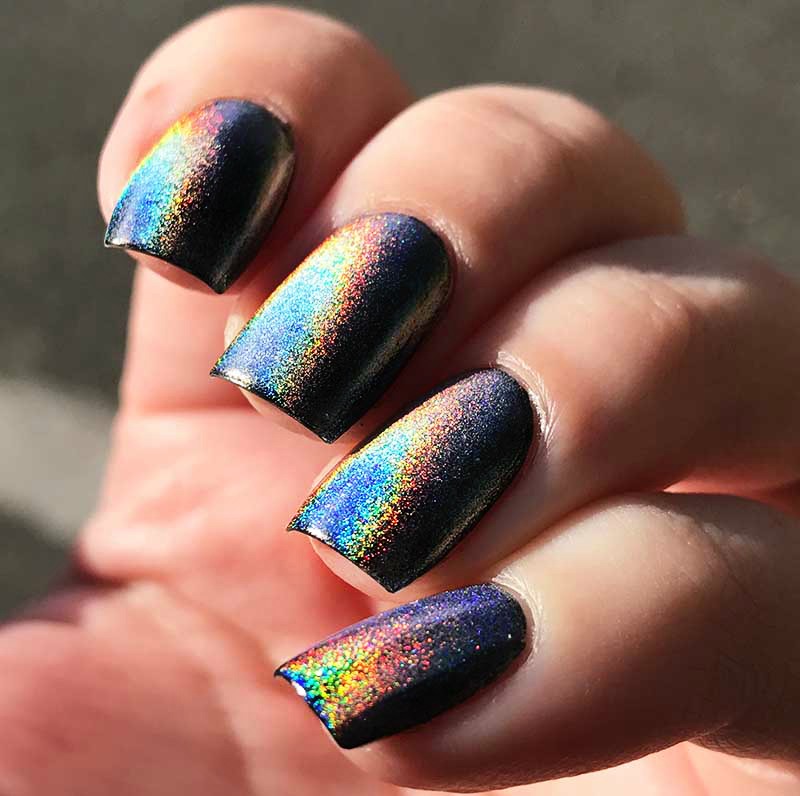
No Gel Girly Bits Holochrome Powder Tutorial
If gel is your thing, then by all means, go for it. I don’t like working with gel simply because if I mess up, removal can take a bit. I do try to use peel off bases, but if it worked out, I wanted it to last longer than a few hours (I generally use the Vapid Commitment Issues which isn’t a long lasting one on purpose). This method lasted on me all day today with no issue.
When it’s time to remove, just use normal remover. Since it’s not gel, you don’t have to go through the removal process of a gel product. You can use UNT as the base and pop the gel off with an orange stick though if you prefer the gel route and don’t want that removal process.
Here’s where you can purchase everything I used:
UNT Nail Lacquer Base: Amazon | Price: $10.00
Black Creme: Darling Diva Polish Shop | $8.00
Superchic Lacquer G-Force X: Superchic Lacquer Shop | $6.95
Vapid Lacquer Commitment Issue Peel Off Base: Vapid Lacquer Shop | $5.00 (you can also get the real latex barrier, Purple Polish Eater, for the same price)
Holochrome Powder: Girly Bits Shop | $19.78 (there is also a slightly different version for $7.99)
Girly Bits Glitter Glaze Top Coat: Girly Bits Shop | $6.10
So there you have it, my tutorial on how to use the powders without gel polish! Hope this helps those of you who aren’t interested in using gel polish!
*Products in this post were purchased by me. The Amazon link is an Amazon Affiliate Link
24 comments
I love how this powder is equally holo over gel and regular polish. I like your method of timing the proper dryness of the nail with the peel off barrier!
Aside from what to top it with, timing was seriously my biggest hurdle. I’m too impatient!
That’s really the trickiest part of using powders with regular polish.
Great tutorial! I just got the Superchic G Force in the mail today so im eager to try this!
Yay! That stuff is incredible
You’re my nail polish fairy!!!
<3
this is really interesting. I read it four times to make sure I understand. So Supernatural G-Force X…do you use it for other things or applications, too, or mainly just for powders? Like that’s what it’s made for is powders, right? Is it sort of like CND Sticky?
I assume you can use G Force X much like a sticky base coat as well, but primarily it was formulated with this purpose since the use of powders has become so popular
That’s fantastic! So with this technique, removal is done with acetone?
With this technique – normal remover is all you need for removal!
This stuff is incredible! Thank you for the step by step for non gel use!
My pleasure!
I’m loving the final result. Can you come over and do my?
You’re a nail genius! I had no idea a powder mani was so much dang work. But it was worth it because your mani was beyond compare!
yup. Gonna try it.
I too finally pulled my powders out that I had been hoarding since I don’t use gel either. Thanks for the tips.
I’m mesmerized. I’ve seen the end result and wanted to have that look on me and now I know how to get it. I think this is stunning.
Absolutely gorgeous but I would never be that patient to do it myself.
[…] miserably at it. This go around, we’re using the same method I used in yesterday’s no gel tutorial, but instead of Girly Bits Holochrome powder, we’ll be using What’s Up Nails Paradise […]
Amazing! I have been wanting to try these holo powders but no way was I investing in the whole gel setup just to play with something new. I’m bookmarking this post. :D
Oh wow, that is so cool! Love the end result!
Hot damn that holo is amazing! I need that Super Chic so I can try out powders!
[…] we’re going to go over my results. I basically followed the exact same tutorial that I posted before using the SuperChic Lacquer G-Force X, but this time replace G-Force X with Yellow […]
Comments are closed.