I got several requests to show how I did my Milani water marble this morning (and from sneak peeks last night) so I decided to give it picture tutorial a go.
It’s been awhile since I have done a tutorial, so hopefully this makes sense for everyone. If you have any additional questions, feel free to ask them in the comment section!
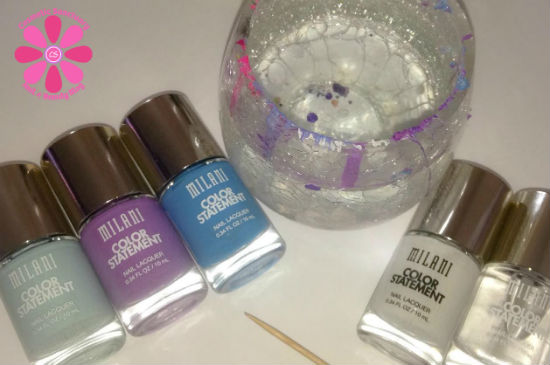
What I Used
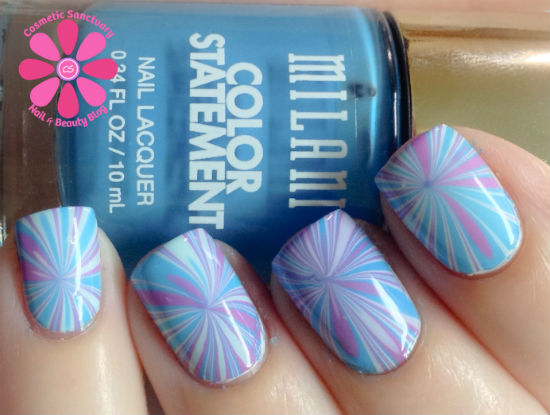
For this water marble I used my glass water marble cup (it’s well loved as you can see!), ROOM TEMPERATURE (this is important!) filtered water (I use bottled water, Crystal Geyser if you want to get technical, that has been left out on the counter), a toothpick, Milani Spotlight White as a base, Water Front, Imperial Purple & Mint Crush for the marble and Quick Dry Top Coat to seal it all up.
I do recommend using tape, Elmers glue or Vaseline to protect your skin and cuticles. Since I was only doing 1 nail for this tutorial I pretty much forgot to. This really helps for clean up after though and will save you time.
Step 1
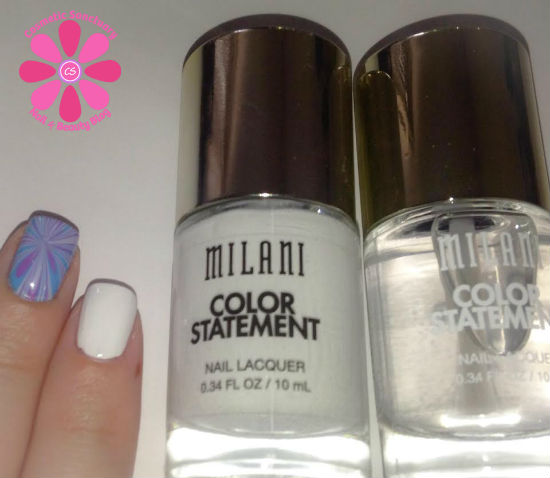
First I applied 2 coats of Milani Spotlight White as a base to make the colors pop. Once both coats were dry I added a coat of Milani Quick Dry Top Coat. Wait for your nails to dry completely.
Step 2
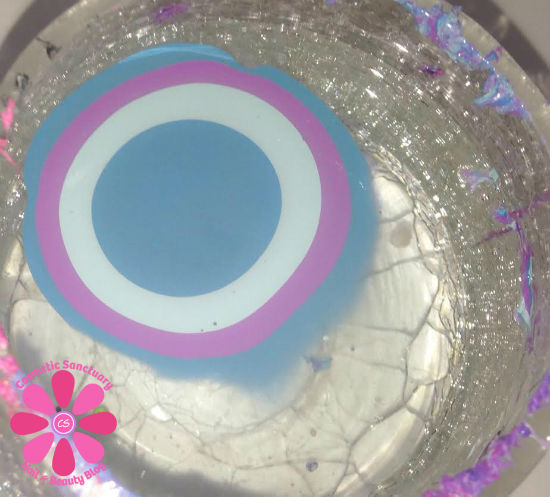
In your cup of room temp, filtered water start dripping your polish color by color, 1 drip at a time to form rings in the water. For this design, the more rings you can get, the better. 8-10 is ideal.
If your polish isn’t spreading into rings, or at all, you can add a couple drops of polish remover to your water. It is possible though that your polish isn’t water marble friendly, so it is a good idea to test each color before you really start by doing droplets in water as a test.
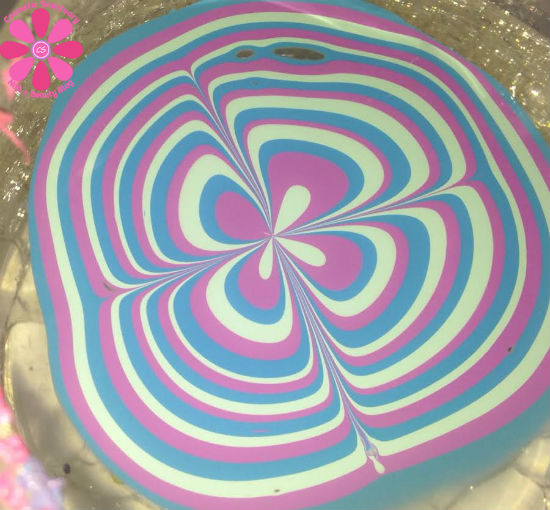
Step 3
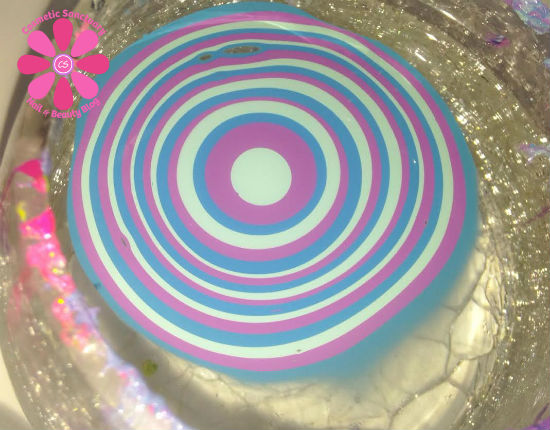
I managed to get about 18 rings before I was ready to make the design. The rings need to be made fairly quickly, otherwise the outer rings start to dry on the water and will pull. If you aren’t careful, you may snag your toothpick on a drying ring and ruin the whole circle of rings.
Step 4
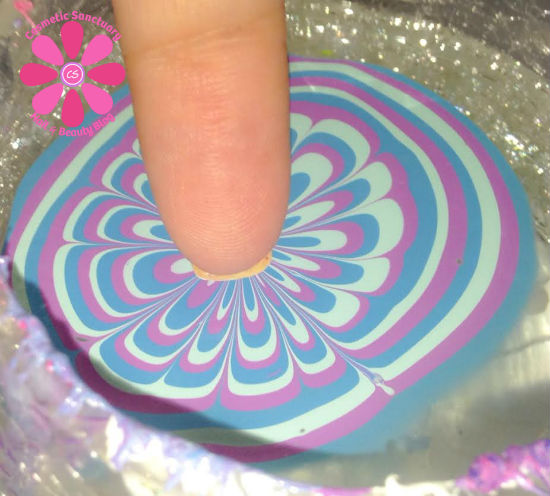
Start dragging your clean toothpick (needles work too) from an outer ring (I usually start about 3 rings in) towards the center of the design. I start at the top and move to the center, then bottom to center, then left to center and then right to center. You want to alternate which direction you go from, otherwise the circle will become lopsided and you will get an entirely different design.
Make sure to have a paper towel handy and wipe the toothpick between each drag. Each time you dip it into the design it should be as clean as possible.
Step 5
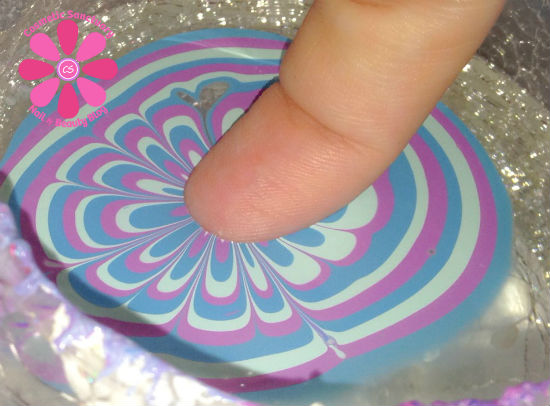
Keep dragging from the outer circle to the center until you have the desired pattern. At the end, dip the toothpick in the dead center of the design to “pull” the design together in the center.
Step 6
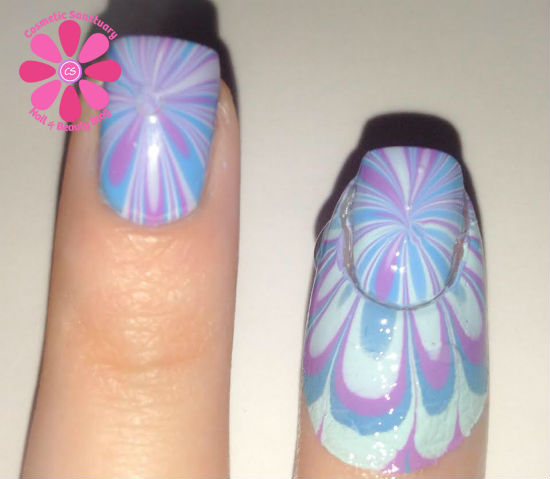
Position your nail over the desired area. Usually I use the outer edge that looks more like petals to get the loopy look. For this design though I want to use the center.
Step 7
Submerge your nail, face down, into the polish.
Using your toothpick, carefully dip it into the outer edge of the rings and gently swirl it into the water. This will help to pick up and remove excess polish that you didn’t dip the nail into. Once you have removed excess polish from the water, gently lift your nail out.
Step 8
You should have something like this once you lift out of the water. I used another toothpick to gently outline my cuticle area and separate the polish design from the skin and nail. If you applied tape, Vaseline or Elmer’s Glue, this part will be easier.
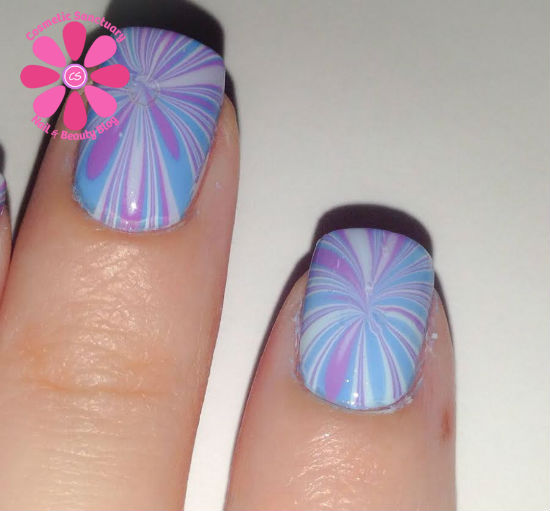
Done!
Since I did not protect the skin, I simply used a pointed cotton swab and some remover and cleaned up the skin. You can be really precise and keep at the skin and cuticle to clean it up, or do it my way and let it gently remove itself in the shower the following morning.
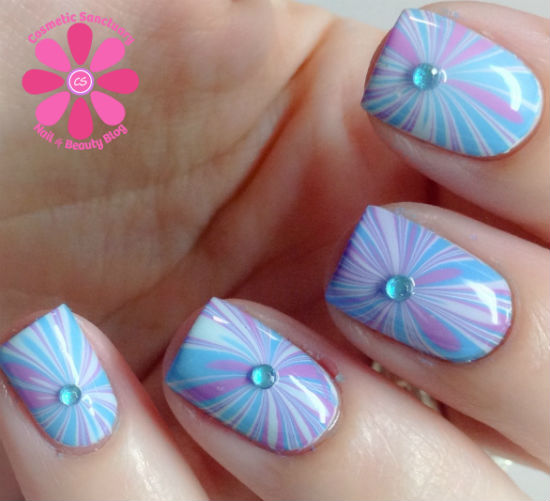
As I showed in my last post, I added fun gems to the center of the starbursts for added flair.
As I said earlier, if you have any questions, feel free to ask in the comment section. I will be happy to answer to the best of my ability.
Milani Color Statement Nail Lacquer Price: $3.99 Each
Where To Buy: Milani Website
Connect with Milani on Social Media: Instagram | Facebook |Twitter
Hope you enjoyed this, and I do hope to brush up on tutorial skills and move back into trying to make some video tutorials.
In case you want to pin a photo with no discussion, here is a collage of steps you can save:
Have a great night!
78 comments
Comments are closed.
Add Comment