Gel polish isn’t an every day thing for me, but if you want long lasting manicures, they are definitely the way to go! Usually I change my polish daily, but if I go on vacation, I prefer gel polish since it lasts the duration of most of my getaways!
Today I have DIY Hard Nails Gel Polish to show you. I wanted to test drive it as well, so I used both gel polishes I received in one mani!
I am pretty much a complete amateur when it comes to gel polish, but DIY Hard Nails was easy to apply and much easier to control than others I have used.
I received a DIY Hard Nails Base Coat, Top Coat and the 2 shades you are about to see for this review. I provided my own LED light, which are easy to pick up at your local drugstore.
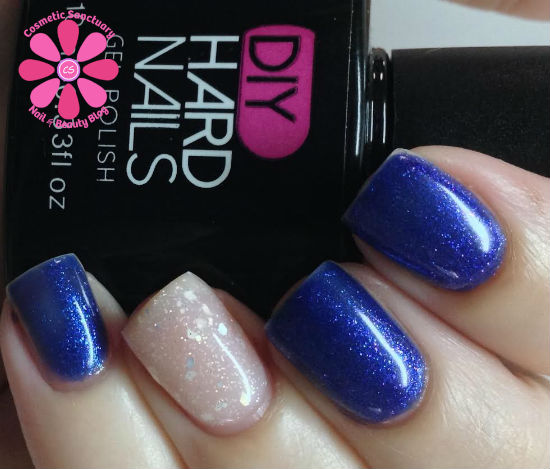
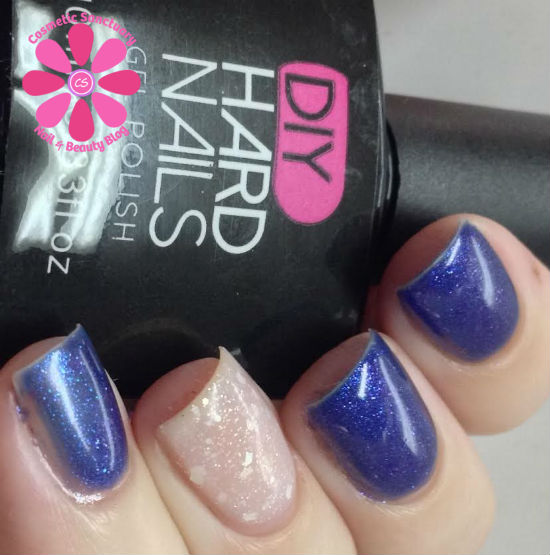
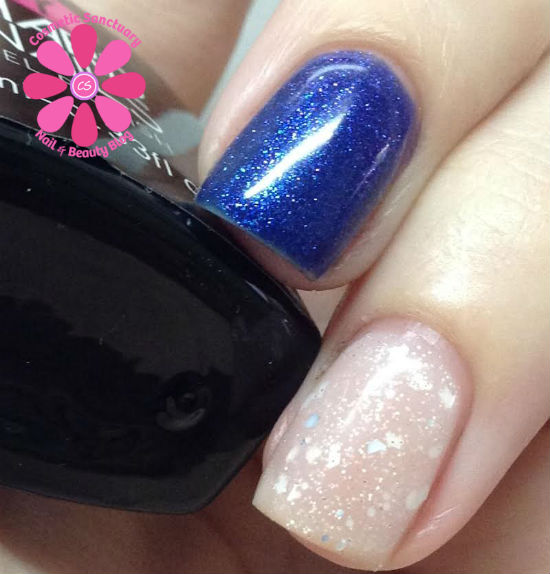
The gorgeous shimmery blue is Blue Velvet and the sheer frosty white with glitters, that’s Pink Frost.
Blue Velvet is a beautiful deep blue base with blue and purple micro shimmer within.
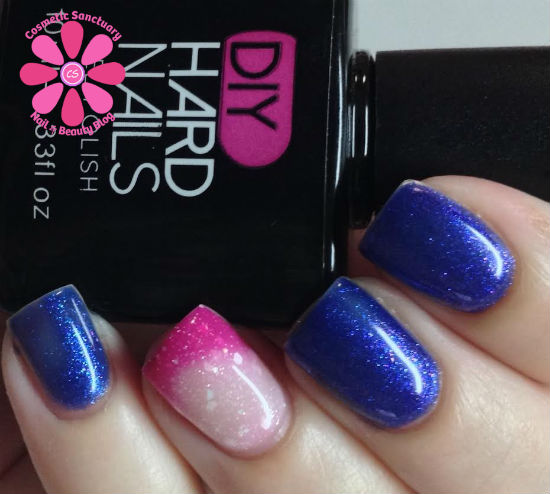
Pink Frost is a color changing gel polish! This goes from a beautiful sheer white with white and silver glitter. It’s GORGEOUS. When cold though, it turns a bright, bold pink. Really stunning change.
Application process was simple. I had my LED light set up and applied the base coat, then cured the base for about a minute and a half. Then I applied 2 coats of each color (curing in between coats for another minute and a half) and then added a top coat, and again cured it for a minute and a half. Then I used a cotton ball and rubbing alcohol and swiped it over each nail. After that I was good to go and hard shiny, chip free nails for a week!
And here is Pink Frost mid transition. Its been fairly hot here in California, so getting it to change was difficult because it is SO hot. It instantly changed though with the assistance of ice water!
Look at that bold color! Love it!
And instantly transitioning back when it realizes how hot it is…
Overview
I’m a beginner at gel polish, and this set was simple to use. The coats were easy to control, and I used 2 coats of each color for these photos. The pigmentation were great and they both had an “indie polish” feel to it with the mix of glitters and shimmers!
Removal wasn’t too bad. I used my glass file and filed away at the top coat layer, then soaked my nails in acetone remover to loosen them up. Once done, I used a metal cuticle pusher and gently lifted the gel from my natural nails. Like one would expect, I did need to buff the top of my nails lightly to smooth them out completely, but nothing too horrible. Overall a good experience and one I wouldn’t mind doing again.
I’m about to head to Connecticut for over a week later this month, so I will be putting Pink Frost back on for that journey!
Price: $14.99 – $16.99 per polish
Where To Buy: Your Beauty Secrets Website
Check out their website for even more swatches! They use real swatches on their site so you can get a feel for what they have to offer, and from the 2 polishes I received, the swatches are incredibly color accurate!
The Giveaway
DIY Hard Nails was generous enough to offer one of my readers a chance to win DIY Base Coat, Top Coat and 3 colors of the winners choice! If you are a seasoned gel pro, or completely new to it, this is a great way to test them out!
Giveaway will end August 15th at midnight.
Must be 18 years or older to enter.
DIY Hard Nails will provide the winner with 3 Gel Polishes of the winners choice from the DIY Website as well as a base coat and a top coat. Winner will need to provide their own LED or UV light to “cure” the gel polishes.
Good Luck and Have Fun, and as always, thank you to DIY Hard Nails for such an awesome prize!
I received one or more of the products mentioned above for free using Tomoson.com. Regardless, I only recommend products or services I use personally and believe will be good for my readers.
62 comments
Comments are closed.
Add Comment